Search This Blog

Showing posts with label soy sauce. Show all posts

Wednesday, May 8, 2013

Thai Cabbage Summer Salad


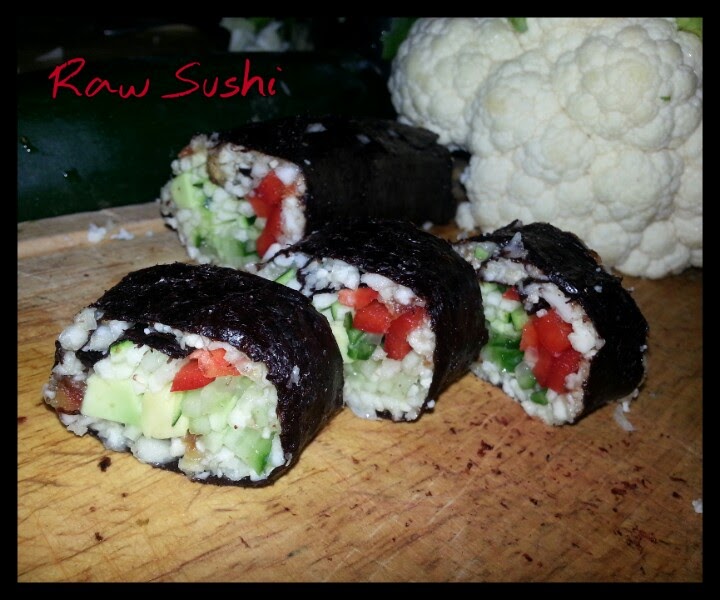
A couple weekends ago I had the great pleasure of going over to a friend’s house for a ‘smoke’ night, and by smoke I mean smoked meat. Yumm…. Not so much. Haha, not really my thing, but exciting for everyone else there. Our friend just bought a new smoker and he was really anxious to try it out and Devon loves any excuse to eat something smoked.


So what was I going to make, seeing as I was not going to eat what they were having? A wonderful salad! Yup I was going to bring salad to a meat party. Don’t think I cant hear you guys out there quoting the Simpsons “you don’t make friends with salad”. Well I was and I did! Everyone who tried it said it tasted great and some (like myself) even went back for seconds!

I was really excited to make this one too, the ingredients are so colorful, and the Thai peanut sauce was making my mouth water. For me anything with a Thai peanut sauce is golden.
This is a perfect salad to make when you have left over quinoa in your fridge, a) because its one less step in making this salad b) the quinoa is already cold! c) who doesn’t love using leftover food, instead of throwing it out later on that week.  
It is such a fresh, crisp and tasty salad it is now in my repertoire of meals that I can either make at home or bring to family suppers.

If you or someone you know have nut allergies, just sub out the cashews and peanut butter for almonds and sunflower seed butter!

Ingredients  4 - 8 people
½ head purple cabbage
2 cups of cooked quinoa
2 carrots, grated
1 red pepper, diced
1 zucchini, diced
¼ red onion, diced
½ cup cilantro, chopped
½ cup cashews

Thai Peanut Salad Dressing
¼ cup organic peanut butter
1 tbsp fresh ginger, grated
1 tbsp soy sauce
2 dates
1 lime, juiced
Combine all of the dressing ingredients together in a high speed blender and puree until smooth. Pour dressing over salad right before serving and fold in until completely combined. 

Sunday, April 28, 2013

Rawkin Homemade Sushi with Wasabi


I crave sushi about 5 times a month, unfortunately we only go out for sushi about once every 2 months. So you can see my dilemma, my cravings are not being satisfied! Oh the horror! But seriously I love sushi, it is one of my favourite meals and when I eat it, I eat a lot. That’s why I love going out for sushi at DK Sushi House here in Moose Jaw, because they have 'all you can eat' for $24.00 per person. We usually get a group of 8 people together to share the endless rolls, which leads to us complaining of how full we are when we leave. My brother in law Sean usually brings up that One time we made him eat the last piece, 9 months ago, that sent him over the edge of fullness. Something that we thought he would have gotten over, but apparently not!

So one night I stopped by Ashley’s house after work and after talking for an hour, I got the craving for some sushi. I mentioned it to Ashley and her eyes lit up with excitement, she wanted to go to! But she wondered if they would make her rolls without rice in them, she just wanted the nori and the vegetables. We figured we would call and ask before going down to make sure they would and success, they said they would! We didn’t get ‘all you can eat’ because it was just the two of us, but we definitely left full!

Me eating my seaweed salad, and Ashley's no rice sushi rolls!
While there we got to talking about making our own homemade sushi, raw and cooked. I had tried making traditional sushi before with Devon, but it was really soggy and I ended up just scraping off the rice and veggies and eating it like a stir fry. So naturally I was a little apprehensive about making it again. Ashley suggested that we try making raw sushi with cauliflower rice instead, she had noticed someone else had made it and was interested in making it herself.

The next day I was still craving sushi and thought about just making my own. Heck I am not made out of money, so going to Sushi House again was out of the question. Luckily I had cauliflower in the fridge and was curious about how it would turn out. So I got to work on ricing the cauliflower in my Vitamix and thought “how is this going to stick together?”…. Dates, of course! So I threw some chopped up dates in and pulsed until well mixed. I rolled one up, tasted it and thought ‘WOW! Ashley needs to taste this!’ So I immediately texted her to get her butt over to my house for an amazing supper! Little did I know, Ashley was going to SuperStore to get ingredients to make raw sushi too! Great minds think alike!

We were both really satisfied with the result of the sushi, the only thing is you have to eat it immediately or else the nori wrappers get soggy. That could have to do with the quality of the paper or with the water content of the cauliflower, either way, you have to basically roll ‘em and eat ‘em.
 
Ingredients 6-10 rolls
1 pkg raw nori papers
1 head of cauliflower
5 majool dates, pitted and diced
1 red pepper
1 avocado
1 small zucchini
½ cucumber
1 bamboo rolling mat

Thinly slice all of the vegetables, using a mandolin or your knife. Rice cauliflower in high speed blender, only pulsing. Optional step, remove cauliflower from blender and pour into a bowl, take a couple paper towels and try to extract as much water as possible. Throw back into blender and pulse the dates in.
Lay out nori paper on a bamboo rolling mat, the longer side parallel to your body. Spread out a thin layer of cauliflower rice, in the middle of the paper lay equal amounts of vegetables, try not to add too much or it will be difficult to roll up. Using the rolling mat, roll up the paper tightly. Using some water to seal off the edge.
I like to have the seam of the paper on the bottom of the cutting board while cutting. Also it helps to wet your knife before cutting too!
Cut into sections and eat immediately! Serve with soy sauce, wasabi or ginger and enjoy!

After I wrote this post we went out again for sushi a few weeks later and Ashley brought something that I totally fell in love with: homemade wasabi! It tasted just like the typical green stuff you get from the restaurant, only this was all natural. I mean who would think of making their own wasabi and bringing it to a sushi place? My brilliant sister Ashley, thats who. So here is the link to her site to get this super easy recipe so the next time you make your own raw sushi or when go out you can bring your own too!

Thanks for reading!
Xoxo -N

Sunday, November 18, 2012

Vegan, Gluten Free Poutine :)

I have always been a HUGE fan of poutine. It was one of my staples when I was going to the UofS, and Exeter had the best poutine! I would frequently get it for lunch, so naturally Freshmen Fifteen caught up to me. It wasn't all poutines fault of course, there might have been some drinking involved along with trips to Wing Nuts, Verns Pizza and DQ. Poutine just happened to be my favourite. 
With the cold weather settling in I am constantly wanting hot, comfort food and on Saturday at work I had the biggest urge to make poutine. I was so excited. I had never made my own vegan gravy from scratch but I thought it shouldn't be that hard. So after work I went out to get some groceries for the amazing concoction, along with some other things we needed at home. 

I told my husband what I was planning on making and he was all in. We also decided on making our own fries, we have our mandolin that makes them so why not. They taste so much better when you do, and if I am going to eat poutine I might as well go all out. 
Devon sliced up the potatoes while I started making my gravy. It was super simple and didn't take that long, unlike the fries. We decided to coat them in vegetable oil (which I never use unless we are doing fries) and threw them in the oven for 40 mins turning them every 15 mins or so.

After the fries were done, I piled the ingredients together making sure I put the Daiya cheese in the middle of the hot fries and the hot gravy. But I then thought I would just throw my bowl in the oven for 5 mins to get the cheese to fully melt. 
This was heaven, I haven't had poutine in over a year! However, I am a little scared because now I can eat it when ever I want! 
This is the W-Sauce I used.
You can find it at Nutters!

Gravy
1 medium Onion, diced
1 cup of Mushrooms, diced
1 tsp of Coconut Oil
2 cloves of garlic, diced
1/4 cup of gluten free Flour, I used Quinoa Flour
1 cup of Vegan Broth
2 tsp of Soy Sauce, Vegan Gluten Free 
1 tsp of Worcheshire Sauce, Vegan Gluten Free

In a small sauce pan saute the onions, garlic and mushrooms in oil until soft. Gradually alternate adding flour and broth to the onions and mushrooms until there are no clumps. Add the soy sauce and the worcheshire and continue to cook for another 5 mins. If the gravy is too thick then add more broth/water until you get your desired consistency. I like my gravy to have a smooth texture so I blended mine in my Magic Bullet until smooth. However, if you like the chunky texture then exnay the blender.