Search This Blog

Showing posts with label spinach. Show all posts

Monday, August 19, 2013

Summer Fresh Vegan Grilled Cheese

This past weekend I was lucky enough to find some fresh garden tomatoes at the farmers market, along with cucumbers, a Cajun spice mix, beets, carrots, beans, potatoes and purple garlic. Of course I was happy to bring home all of my vegetables but I was mainly happy about the tomatoes! For me there is nothing better than a fresh tomato out of the garden. It literally is one of those simple pleasures you can only experience a couple months out of the year here in Saskatchewan, so when they are in season I really try to eat as many as possible because I know it’s going to be short lived.

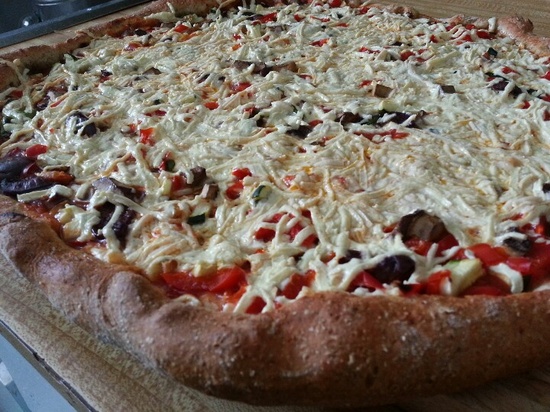
When I got home I was contemplating what to eat for lunch and then I remembered that I had just bought a new kind of Daiya from Safeway, the Swiss Cheese Slices. And what better way to use them but in a grilled cheese sandwich. I got out the bread, the Daiya and some coconut oil and got to making my lunch, but then I thought “what could make this better?” I searched around my fridge and couldn’t really think of anything to put on top, but then I spied the tomatoes I had just got from the farmers market and that sparked the idea of a tomato, spinach grilled cheese.
After I decided what to put on my jacked up grilled cheese, I wasn’t too sure how this was going to turn out with the spinach and tomatoes. Would the tomatoes make the bread soggy? Will the spinach be too wilted and turn into mush? I wasn’t totally positive this was going to be a hit, but I like to cook dangerously and I was willing to take the risk. And I am really happy I did! Not only did the bread not turn soggy, but the spinach and tomatoes were cooked just right and the cheese was melty!
The tomatoes and spinach really brought this typical sandwich to another level for me. The freshness of the garden tomatoes with the earthiness of the spinach really brought this typical sandwich to another level for me. It going to be really hard to go back to just eating a just plain grilled cheese again because this was one of the best grilled cheeses I ever had.

Summer Fresh Grilled Cheese
2 slices of Bread
2 slices of Daiya Swish Cheese Slices or any other Daiya cheese your prefer
1 tomato
Baby spinach
Coconut oil

I like to layer the sandwich with the cheese on the bread then the spinach then the tomatoes. You want to keep the tomatoes as far away from the bread as possible so it doesn’t get soggy. Also when making a Daiya grilled cheese you kind of have to be a little inventive. Daiya doesn’t melt as quickly as dairy cheese, so when making something like a grilled cheese you have to be a little patient and watchful or else you could end up burning your bread or not having a completely melted sandwich. So what I do is turn the stove onto about medium high and cook the one side until golden brown (about 2 minutes). Then when I flip the sandwich over, I take it off the heat, cover the frying pan with a lid and let it sit for another 2-3 minutes. That way the steam is trapped and helps melt the cheese.

Thanks for reading!
Xoxo -N

This is what I found when I cut open the tomato I was using! Gotta love life's little messages!  

Tuesday, June 4, 2013

Vegan Pizza Pops and Vegan Pesto Pizza

I wonder if you are getting tired of my pizza posts? I am certainly not tired of making the pizza and eating it, hence all of the recipes I have posted!
This time I made a homemade pizza pocket, or a calzone, depending on how you want to see it. AND I made a mini pesto pizza. Two for one today folks!

When you really think about it, you can do a lot with pizza dough, and by simply changing up the toppings, shape or size of what you are making, it changes the whole meal. Especially when it come to kids. What kid wouldn’t love decorating his own pizza with the toppings they love, maybe even making it have a face. Its simple changes to the meals you and your family love that make the difference between the same old, same old into something new and delicious.

For those of you who read my Homemade Pizza post, this is the same dough recipe.

Pizza Dough – 2 Pizza Pockets and 2 mini Pizzas
1 ½ cup whole wheat flour
2 tbsp ground flax
2 ¼ tsp quick-rising yeast
½ tsp salt
2/3 cup very warm water
2 tsp olive oil
2 tsp. date honey *recipe below


In a medium bowl, combine flour, flax, yeast and salt. Mix well.
Measure warm water in measuring cup, then stir in olive oil and honey. 

Pour mix over dry ingredients and mix using wooden spoon to form a ball. 
Turn dough onto a lightly floured surface. Knead for 2 mins. 
Grease inside of another bowl with olive oil and place dough inside. 
Cover with plastic wrap. Let rise in warm place until double in size (about 20mins).
Divide the dough between the number of pizza pockets or mini pizzas you would like (max 4)
Roll out dough over lightly floured surface into a circle. 
Put on toppings and bake at 425 for 15-20 mins.
**While the dough is rising I cut up the vegetables to have ready.

For the toppings I used:
1/3 sm can tomato sauce
½ red pepper, diced
3 mushrooms, sliced
½  zucchini, sliced
½ cup shredded Daiya mozzarella 

Date Honey - makes ½ cup

5 dates
¼ cup water
Blend in high speed blender until smooth, store the rest in the fridge.
 

Mini Pesto Pizza

Pesto Sauce
½ cup of cashews or sunflower seeds, soaked for at least 4 hours

1 lemon, juiced
1 clove garlic
1 large handful of spinach
5 sprigs of basil, de stemmed

Lightly chop up the spinach and basil, and throw all of the ingredients into a high speed blender. Set on medium high and blend until smooth.

Toppings
3 mushrooms, sliced
½ zucchini, sliced
Top with fresh spinach


Thanks for reading,
Xoxo -N

Thursday, May 2, 2013

Organize Your Juice Cleanse in 4 Easy Steps


Juice cleanse! Yup I am going there again! I had plans on doing another one after Mexico but that kind of fell by the wayside. Technically though, this IS after Mexico so I wasn’t totally lying to myself, I am just a procrastinator, no surprise there.

I had tried starting one about a month ago but I just wasn’t motivated enough and ended up just eating all of the produce I had bought for it instead of juicing it. At least it didn’t go rotten in my fridge! There is nothing I hate more than the forgotten brussle sprouts in the back corner that go rotten, I can literally see money being tossed away and a good meal being wasted.

I found the last time I did a juice cleanse it was kind of hard to get my proportions right and figure out if I had enough food in my fridge to last the rest of the cleanse. I found myself running to the grocery store more times than needed, which can be a bit of a hassle. So this time I thought I would plan out what juices I wanted to drink and make out a list of what I will need. Sounds good right? That should alleviate things a bit and make it easier to get back on the juicing train. BUT! What if I take it to the next organizational level?!

Below I have outlined four simple steps to help guide you in starting your juice cleanse, which is always the hardest part. So here are my tips and tricks to start a successful juice cleanse:

1)    Make a list Do some research and figure out which juices you would love to drink and make out a grocery list of everything you will need.  If you are doing a longer cleanse like 10 days, you can break it up into 2 grocery trips to avoid not having enough room in your fridge. I have listed below some of the juices I am drinking, which are great basic ones that are sweet and delicious.
2)    Wash your produce
This may seem like a no brainer, but it really helps you out in the long run. Fill your sink up with cold water and a cup of vinegar and throw in all of your fruit, veggies and leafy greens. Let them sit for 10 mins giving them a scrub to get off all of the dirt. Aslo you should de stem any fruit or veggies that need to be broken down (not the fruit!). Now when you go and juice its all ready to just throw in.
3)    Pre Package your meals
I don’t know about you but I buy all of my leafy greens from Super Store and they always come in these plastic containers that are a bitch to deal with. So why not use them to pre portion out all of my juices in the fridge so all I have to do is grab a container and bam! Its already washed, chopped and portioned for me to just throw in and juice away!? AND I know that I have enough produce to do my whole cleanse (or half of it) without having to go to the grocery store. Don’t forget to label which one is which, or you can leave them unlabeled and live dangerously! Ooo the possibilities!

4)    Cut down on cleaning
Take a bag – I use the thin vegetable bags you get at the grocery store - and line the container that the pulp goes into. You can then dump out the pulp and reuse the bag for the next meal and save you time cleaning it out. And always, always clean out your juicer right after you are done, if not she will be hard to clean out and you will get frustrated!


These are some of the juices that I am going to be drinking throughout the 10 days:

2 apples
4 stalks celery
2 big handfuls spinach
1 cucumber
1 lemon

2 pears
3 stalks kale, de stemmed
3 stalks celery
1 cucumber
1 lemon

10 oranges
2 grapefruit

12 oranges

I am already on day four and I feel great. Other than feeling a little tired during the day and having food cravings (not hunger pains) I feel pretty normal. I am trying to do 10 days but I am not putting any pressure on myself if I don't feel like finishing. I hope my tips and tricks help you out on your journey because I know they helped me!

Thursday, April 18, 2013

The New Cauliflower Pizza, Vegan Gluten Free


This weekend we had the pleasure of babysitting our nephews, Brody and Carson. I always look forward to spending time with them because this is the age when they still want to hangout with us and they will still give us hugs and kisses. However, I think the one who benefited the most out of this get together was our dog Lucy. She is an attention whore and can con anyone into giving her a scratch on the head or belly. So when two young boys who love to hug and pet her come over, she is in doggy heaven! 
We had them for a good portion of Sunday, so I had to decide what to make them for supper. The first thing that came to my mind was pizza! What kid doesn’t love pizza? So I asked them what kind they would like and their response was:
Brody: Ordered in pizza
Carson: Cheesy bread.
…..
Well that didn’t get me very far. So I asked again, clarifying that we are making our own and that they could put WHATEVER they wanted on it. Carson still answered cheesy bread and Brody answered pepperoni. Success! I got one of them to answer. Now I just had to explain to Carson that he was going to get cheese pizza instead of the cheesy bread. He took it well and continued to jump off the stairs.
As I was driving I thought about the what kind of pizza I wanted and I really didn’t feel like eating all of that dough. I still wanted all of the toppings that comes with pizza, I just wasn’t feeling the bread part. Well, what about the cauliflower pizza crust that everyone is talking about? Meh, I have tried and it wasn’t that successful, plus with two boys in the house I didn’t feel like experimenting with something like that. That’s when an idea so awesome hit me! Like, so genius I had to look it up to see if anyone else had thought of it before, and to my luck I couldn’t find any other example!

Why not just skip making the crust and just put everything on top of the cauliflower?! Instead of making the crust and getting it to stay firm and crispy, just pile it all on a chunk of cauliflower! So I went from eating a whole pizza crust to myself, to eating almost a whole head of cauliflower to myself. What a great idea, and a healthy one too!
 
Okay so now you are thinking how do I do this? Well, you just take a sharp knife and cut out 1’’ steaks from the middle of the cauliflower you can probably get around 3 or 4 ‘steaks’ from each head, depending on how big it is. And yes I know, there are going to be holes in the ‘steaks’, but that’s okay, only some of the sauce will leak through. 

So the next time you are craving pizza, but want to eat a little healthier, try this out and see what you think. I personally loved it and they are really easy to throw together!

Ingredients – 2 servings (4 pizzas)
1 large head of cauliflower
2 tsp coconut oil
1 can of pizza sauce
3 mushrooms, diced
1 red pepper, diced
4 kalamata olives, de stoned, diced
1 cup spinach
1 cup Daiya cheese, mozzarella

Pre heat oven to 375 degrees.
With a sharp knife slice through a whole head of cauliflower and make 1” thick ‘steaks’, about four individual chunks.
Lightly coat bottom of cauliflower with coconut oil and bake in the oven for 10 mins.
Chop up veggies while they are baking.
Remove the cauliflower from the oven. They should be slightly fork tender.
Spread the sauce all over the top of the cauliflower and put on the toppings. Finishing it off with the cheese.
Bake in the oven for another 10 minutes.
Serve and enjoy!

Thanks for reading!
Xoxo -N

Tuesday, March 19, 2013

Vegan Cashew Curry Sitr Fry

You know those days where you eat at like 3:30 in the afternoon and when supper comes along you don’t feel hungry but you still feel like you should eat something? That is what happened the night I made this. It was 8:00 and I was searching the kitchen for something to eat and was coming up with nothing. Not that we didn’t have any food in the house, I just was being indecisive about what I wanted. So I walked back into the living room and started to watch You Gotta Eat Here and what came on has changed my life forever!

It was a recipe for Cashew Curry sauce that was vegan! Holy Moly it looked amazing and really easy to make. I was super intrigued and it even caught the eye of Devon, the curry hater. So now I was torn, because it was 8:20 and kind of late to be making supper but I really, really, really wanted to make this… sooo I did! We decided to serve it over rice, and we were kind of pumped because we found white rice in the cupboard, something we haven’t had in a long time.


The whole meal only took around 35 minutes to make and it was well worth it. My thoughts of eating so late were silenced by the amazing flavours this supper had. I think I said “I love this” about 8 times while eating it, and now as I type this I am thinking about making it again for supper tonight. The sauce is creamy, thick, FULL of rich flavor and its not that high in fat which is a HUGE bonus. Aside from the oil there is only the cashews in the sauce which add fat, there is no milk or cream, the usual culprits in fatty sauces.

The only changes I made to the sauce from the show was that I reduced the cashews from one cup to ½, I didn’t put in cinnamon and nutmeg, and she used 2 large onions and no spinach. As I was making it I thought that 2 onions was a bit much, so what would be a good substitute for it? I didn’t want to add more cashews and I didn’t want to add something that would drastically change the flavor of the dish. That’s why spinach works so well, it adds great color, nutrients and body to the sauce without having to sacrifice any flavour or add any extra fat. It’s really a win, win here!

If you are a curry fan or are someone who is interested in trying it, I would say you NEED to try this! It wont disappoint you or your family and friends. Enjoy!  

Ingredients: 2 - 4 people

Cashew Curry Sauce
1 tbsp coconut oil
1 large yellow onion
½ cup of cashews, soaked overnight or for at least 4 hours
1 sm can of tomato paste
1 ½ cups of water
2 cups fresh spinach
2 tbsp curry powder
2 tsp cumin
2 tsp coriander
Red pepper flakes to taste

Heat up large frying pan, add oil. Sauté onions until they are golden brown, about 15 minutes on med heat. In a bowl whisk together the tomato paste and water until well blended, add to frying pan and stir in. Add in all spices, spinach and cashews cook for 10 minutes. Pour into a high speed blender and blend until smooth.

Stir Fry Vegetables and Rice
1 cup of rice
2 cups of water

2 tsp of oil
1 head broccoli
½ head cauliflower
4 stalks celery
½ sm. container white mushrooms
1 clove garlic, minced
½ cup water

While the onions are cooking, I chopped up all of my vegetable and cooked my rice. Sauté the vegetables and garlic until fork tender, about 10 minutes. You could have these cooking in a separate frying pan while the cashew sauce is cooking, to save on time.

Add sauce to the vegetables in the frying pan, and stir in. I try not to waste anything, so after I am done pouring the sauce out, I take ½ cup of water and add it back into the blender, turn it on high to get all the sauce off the sides and pour it back into the pan. Just to make sure its all in!

Serve over rice, quinoa or noodles! Enjoy!

Thanks for reading!
xoxo -N

Friday, March 15, 2013

Fruity Colada Smoothie

On Wednesday I had a not-so filling breakfast of just 3 bananas and 4 cups of spinach with coconut water, blended into a smoothie. Normally I have about 2 cups of berries in there but I was out of my favorite frozen berry blend from Super Store. I thought it wouldn’t make that much of a difference in my day, but boy was I wrong.

While at work I was helping a member and I started to get really unfocused and I had trouble remembering numbers. So I attacked my 3 oranges that I brought as a snack and felt so much better. Thankfully I had a healthy snack with me, because I don’t know what I would have done. Well, I would have probably snuck downstairs to the staff room and grabbed a bag of chips, which is a horrible idea because that isn’t good for me or my body.

So that night I was determined to have a filling breakfast and went grocery shopping after supper. I picked up lots of fruits and veggies, including some pineapple and mango. I had this idea of a pina colada inspired smoothie that day and was excited to try it. Happily, I wasn’t disappointed! The smoothie turned out divine and it is now one of my favorites, even my husband said that it was the best spinach smoothie he has ever tasted. 

As you can tell by the ingredient list it makes quite a lot, around 6-8 cups, depending on how big your pineapple is and yes you drink it all to yourself for breakfast. I know it seems like a lot but you need it, trust me. It lasted me all the way until 11:30 and I felt great, I was alert, I felt full and satisfied, which didn't happen the previous day. So if you ever are craving something tropical and are wanting a really filling breakfast this is the smoothie for you! 


Thanks for reading!
xoxo -N

Saturday, March 9, 2013

Homemade Vegan Pizza


I have done a couple posts about pizza because well I LOVE PIZZA! Most of the time we order Family Pizza and I get mine without the cheese. However lately I have been wanting to make my own crust, to see how the two compare. Luckily my sister in law Jennifer had an awesome recipe that she shared with me, and  now will share it with you today! 

I really loved how this crust turned out, Jennifer was right it is awesome. I tried to roll it out until is was as thin as possible because I am not a big fan of thick crust. Basically the reason I eat pizza is for the toppings, the crust is just a vessel, but this crust actually tasted really good! The recipe does call for whole grain flour, so thats what I used this time. Next time I will try my hand at a gluten free version and post how it compares! Also I used a Italian and Herb Olive Oil that I really think added the perfect flavor to the crust. If you don't have flavored olive oil but would like the flavors of herbs feel free to add fresh herbs to the dough! 


When you actually think about it, the time it takes to make and rise the dough plus bake it in the oven, is the same amount of time it takes to make this pizza. And it definitely doesn't cost $30 or $40 to make them. So I hope you can take the time to make this for you and your family one night because you wont be disappointed, I know I wasn't. 


Pizza Dough - Makes 1-12inch pizza1 1/2 cup whole wheat flour
2 tbsp ground flax
2 1/4 tsp quick-rising yeast
1/2 tsp salt
2/3 cup very warm water
2 tsp olive oil 
2 tsp. date honey *recipe below

In a medium bowl, combine flour, flax, yeast and salt. Mix well.
Measure warm water in measuring cup, then stir in olive oil and honey. 
Pour mix over dry ingredients and mix using wooden spoon to form a ball. 
Turn dough onto a lightly floured surface. Knead for 2 mins. 
Grease inside of another bowl with olive oil and place dough inside. 
Cover with plastic wrap. Let rise in warm place until double in size (about 20mins).
While the dough is rising I cut up the vegetables to have ready.
Roll out dough over lightly floured surface into a circle. 
Pinch the outer edges up into a crust.
Put on toppings and bake at 425 for 15-20 mins.


For the toppings I used:
1 sm can tomato sauce
1 red pepper, diced
1 cup mushrooms, diced
1 cup zucchini, diced
7 kalamata olives, pitted and diced
1 handful of baby spinach 
1/2 pkg of shredded Daiya mozzarella 

Date Honey - makes 1 cup
10 dates
1/2 cup water
Blend in high speed blender until smooth


Thanks for reading!
xoxo -N


Thursday, January 10, 2013

Juice Cleanse Day 3.... What? Day 3?

...what it’s already day three? Holy that went by really fast! I actually catch myself thinking about the next couple days and what I will be juicing and I have to stop myself because tomorrow I am introducing solids back into my diet. I would really love to continue on this juice cleanse but because I am traveling I wont be able to juice, so I need to introduce solids back in to make it easier on my digestive system.

Day three is like day one and two, I have energy, I feel good, yet a little tired. I woke up this morning and felt the better than normal, still hitting my snooze button 5 times, but still really well. I was super thirsty this morning and ended up drinking over a liter of water, plus my hot lemon water. I walked on the treadmill for half an hour and danced around the gym by myself for a couple songs. So a really great start to my day! 

For breakfast I made my apple juice but instead of kale I used spinach and for lunch I made my pear-ific. I decided not to go with orange juice again because of what happened yesterday, but I think I will try it for breakfast on Saturday morning!


I slept really well last night, going to bed at 9:00 and falling asleep by 9:45, which felt great. I think the sauna helped with that, it relaxed me and helped me wind down from my day. So I planned on going for a sauna again tonight, but it was so snowy out today that indoors seemed like a better idea!
For supper I did a mango, cucumber and coconut water juice, I was not worried about this one because anything with coconut water in it will be delicious. I also drank another liter of water before I went to bed because I was feeling a little dehydrated and tired, which means its time for bed soon. By the looks of the last three days I am thinking day four should go well, but I am excited to introduce some solids back in. Ashley suggested making a juice and blending an apple into it, so maybe I will make my Green Apple juice for breakfast again and just not juice the apple. I only have two more sleeps until Mexico so the next couple days will be a whirl win of getting things together, luckily this juice diet hasn't slowed me down. 


Thanks for reading!
xoxo - N


Tuesday, December 11, 2012

Lasagna Inspired Layered Salad with Avocado 'Cheese' Sauce

I thought of this salad while lying in bed Sunday morning. I was surfing Pinterest and saw a couple of recipes for avocado mac and cheese. I have been seeing a lot of this recipe lately so I clicked on the link to check out the ingredient list. The one I looked at was not vegan but it had the great idea to use avocado in the cheese sauce. PING! An idea light bulb popped in my head. An avocado cheese sauce would be great on lasagna! But.... I didn’t want to cook it, so the next best thing came to mind. A salad! Which is perfect because I can use all of the ingredients that my cooked lasagna calls for, I just won’t cook any of it!


This past month or so, I have been addicted to the homey flavours that lasagna provides: I have made it 3 times!! YUMMMMM. So I am not surprised that this idea sprouted from my brain. Now I can satisfy my homey lasagna craving with this and feel a little better about eating something that is traditionally seen as ‘unhealthy’. 


This salad is pretty easy to whip up, its just all about timing! First you have to put the cauliflower on the stove to get it steamed. While this is steaming I cut up all of my veggies for the salad and layer them in the bowl. Then I pop my sauce ingredients in the blender, blend for a couple minutes and pour that into a jar and rinse my blender out. By then the cauliflower is usually done, so I take it off the stove and run it under cold water to cool it off (we don't want hot cauliflower mixed with avocado, yick). When making the avocado sauce in my Magic Bullet Blender I had to stir it quite a bit to get it all mixed together. I just didn’t want to add any more liquid to the mixture because I wanted it to be a thicker sauce. I already had the tomato sauce, which was already watery, so two watery sauces wouldn’t have jived well in the bowl. Totally worth the extra effort!


Tomato Sauce Dressing – For 2- 4 servings
2 tomatoes
1 sun dried tomato
½ clove garlic
1 lemon, juiced
¼ cup of oregano
¼ cup basil
3 dates, soaked in water for ½ hour

Put all ingredients into a blender and blend until smooth!

Avocado Sauce – For 2 - 4 servings
1 whole avocado
1 cup of cooked cauliflower
½ clove garlic
1 lime, juiced
¼ cup parsley
¼ cup cilantro
2 tbsp nutritional yeast

Put all ingredients into a blender and blend until smooth!!

Layer spinach, tomatoes, orange bell peppers, mushrooms and zucchini, top with the avocado sauce and tomato dressing!!


I was so excited about this dish I just had to call my sister Ashley over to try it. Luckily she wasn't busy and was able to stop by to sample my latest creation. Her verdict?..... She loved it! and because of that she decided to make this lovely post on Facebook! Thanks Ash for the pretty picture collage! 

Thanks for reading!
xoxo- N